Before I DIYed this storage basket, I'd never successfully crocheted anything. I'd practised unsuccessfully but I had never completed a crochet project. Today, I get to share with you one of my most favourite things I've ever made, my tidy-up storage basket.
Disclaimer: I'm not teaching you how to make this but sharing my experience of how I followed a pattern to make this basket which is free to use right here!
With all this said, you wouldn't believe that I made a video about the process for TikTok (I just joined when I made it) and then completely forgot to take photos alongside it too. I did, however, manage to get some snapshots from the TikTok to show you how I got on with making this DIY. I was so into making it, that I didn't even think to photograph alongside the videos and spent two days solid crocheting it rather than spreading it out over time like you're supposed to (to avoid hand cramps)!
The DIY idea:
The idea to make this basket came along after I discovered the basket pattern whilst browsing through lovecrafts.com for a new DIY. I knew I wanted to crochet something and finally learn how to and ended up finding a pattern for this basket here for free. I thought that maybe because this would require a large needle and thicker yarn, it might be easier to make...
I always wanted one of these storage baskets and making one seemed nicer than buying once, especially since they can be pretty expensive. On top of that, the yarns to make this are made from recycled t-shirts which was a huge bonus. I went straight to their website and bought some white and grey paintbox yarns and a needle ready to (hopefully at this point) make my new storage basket.
What you will need:
- Recycled T-shirt Paintbox Yarns x4 - one in an accent colour and 3 in your main colour.
- A 12mm crochet hook
That's it! It's worth noting that I actually only used two of the three white yarns but it's worth getting it in case you do end up needing it. I'm going to make some machine-washable placemats and coasters with the leftover yarn!
The total cost of this DIY would be: £32 if you used all the yarn but if you're making the smaller one it would be £16. Mine technically cost £24 since I didn't use the fourth roll of yarn.
How long will it take to make?
I literally don't know how long it should take but it all depends on your skill level. It took me 10 hours in total but I definitely think an expert level crocheter can manage it around the 8-hour mark... maybe even 6!? I really don't know. I am guessing here...
Step one - download the pattern guide and choose your size
The very first thing I did was download the pattern guide and choose which basket I wanted to make. They are both very similar and the larger one just requires a few more rounds than the smaller one does.
I also did a lot of research on the crochet abbreviations and language so that I wouldn't get confused when it came to reading the instructions.
It was also really helpful to watch the videos on how to make this basket too which I found on YouTube
here and
here.
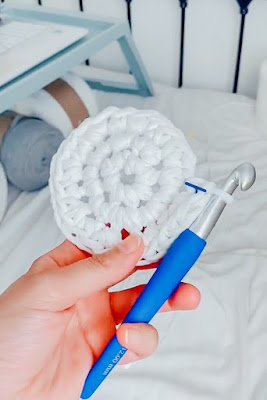
Step two - crochet the base
Once I was ready to go I began by crocheting the base using a circle stitch which basically means you're going to create a spiral for the base. Of all the parts of this basket, I'd say making the base and turning the stitches to create the basket shape was the trickiest parts. There is a specific way to make sure you make a flat base that doesn't curl and a specific way to make a the stitches change direction and so following the instructions was vital here.
I was so careful to make sure that I didn't make a mistake and although I did a few times, it wasn't as many as I expected which was a nice surprise.
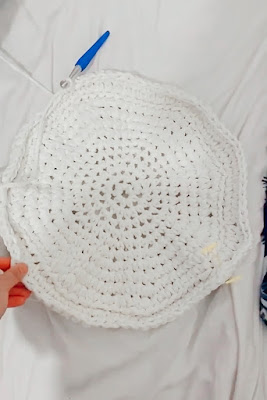
Step three: crochet the base of the sides
After crocheting the base successfully, I came to the hard part. This part, making the sides that would eventually go up and turn into the basket! It took a lot of concentration, but again, following the instructions and watching the videoes were so useful and helped me avoid any mishaps whilst making the basket.
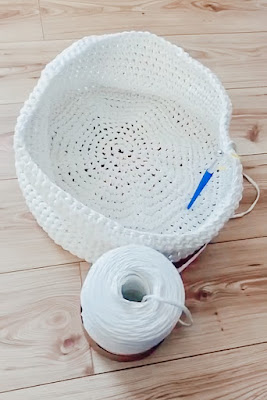
Step Four: Crochet the sides
Next, came the easy part - crocheting the sides! For the entirety of this project, I stitched a circle stitch from the centre of the base to the very top of this basket. It made this DIY a little easier because once I'd done the base, I'd got a lot quicker at crocheting and a lot more relaxed about it too.
When I got nearer to the top, it was time to change the colour and it was quite simple. Again, I'd watched a couple of videos on how to change the colour of the yarn without ruining the stitches and I was really happy with how it came out. It was coming together nicely!
Step Five: Stitch the bobbles
Up until I got to the grey section, I was convinced that I was going to skip this and not do the bobble design that the pattern instructed to stitch onto the grey with white yarn. I was adamant that learning how to crochet and actually make something was enough, but I'd been so successful with my first project, I had a go (after following the video again!) and did an okay job with it.
I didn't like the way they looked at first but once I'd got all the bobbles done, I was so glad I did them. They looked really cute and added that little something extra to the basket.
Step Five: Crochet the handles
I didn't get any photos of this step but the handles were pretty easy to stitch together and in no time, I was done. I couldn't believe that I'd completed this project and was finally ready to use my new tidy-up storage basket for all the blankets in my living room.
The final result
So far, the basket is holding up well. It's sturdy, holds all my blankets with room for more and just sits there looking gorgeous! It's been a good couple of months since I made this and I think it's a worthwhile DIY especially if you're looking for something new to make.
As a beginner, I thought this was a good place to start. Because everything was bigger, you could easily see if you made a mistake and fix it. I tried to make something recently using regular yarn and I can tell you that I definitely find larger yarns easier to work with already. I'd also like to mention that I pick up crafty skills quite quickly (unless it's knitting - still can't figure that one out) and so I'd probably class myself as a beginner with the potential to be intermediate which is the skill level recommended for this DIY on the pattern PDF.
I absolutely love how this basket turned out and everyone who I've shown it too can't believe that I made this in just a couple of days. I'm so proud of it that I'm thinking of making another one for the new guest bedroom/office in the new house but in pink or purple! I have a theme in mind for that room and a basket like this would be amazing in there.
Pin this post!
What do you think of the final results? Did I do the DIY justice? And what do you think I should crochet next?


No comments
Post a Comment