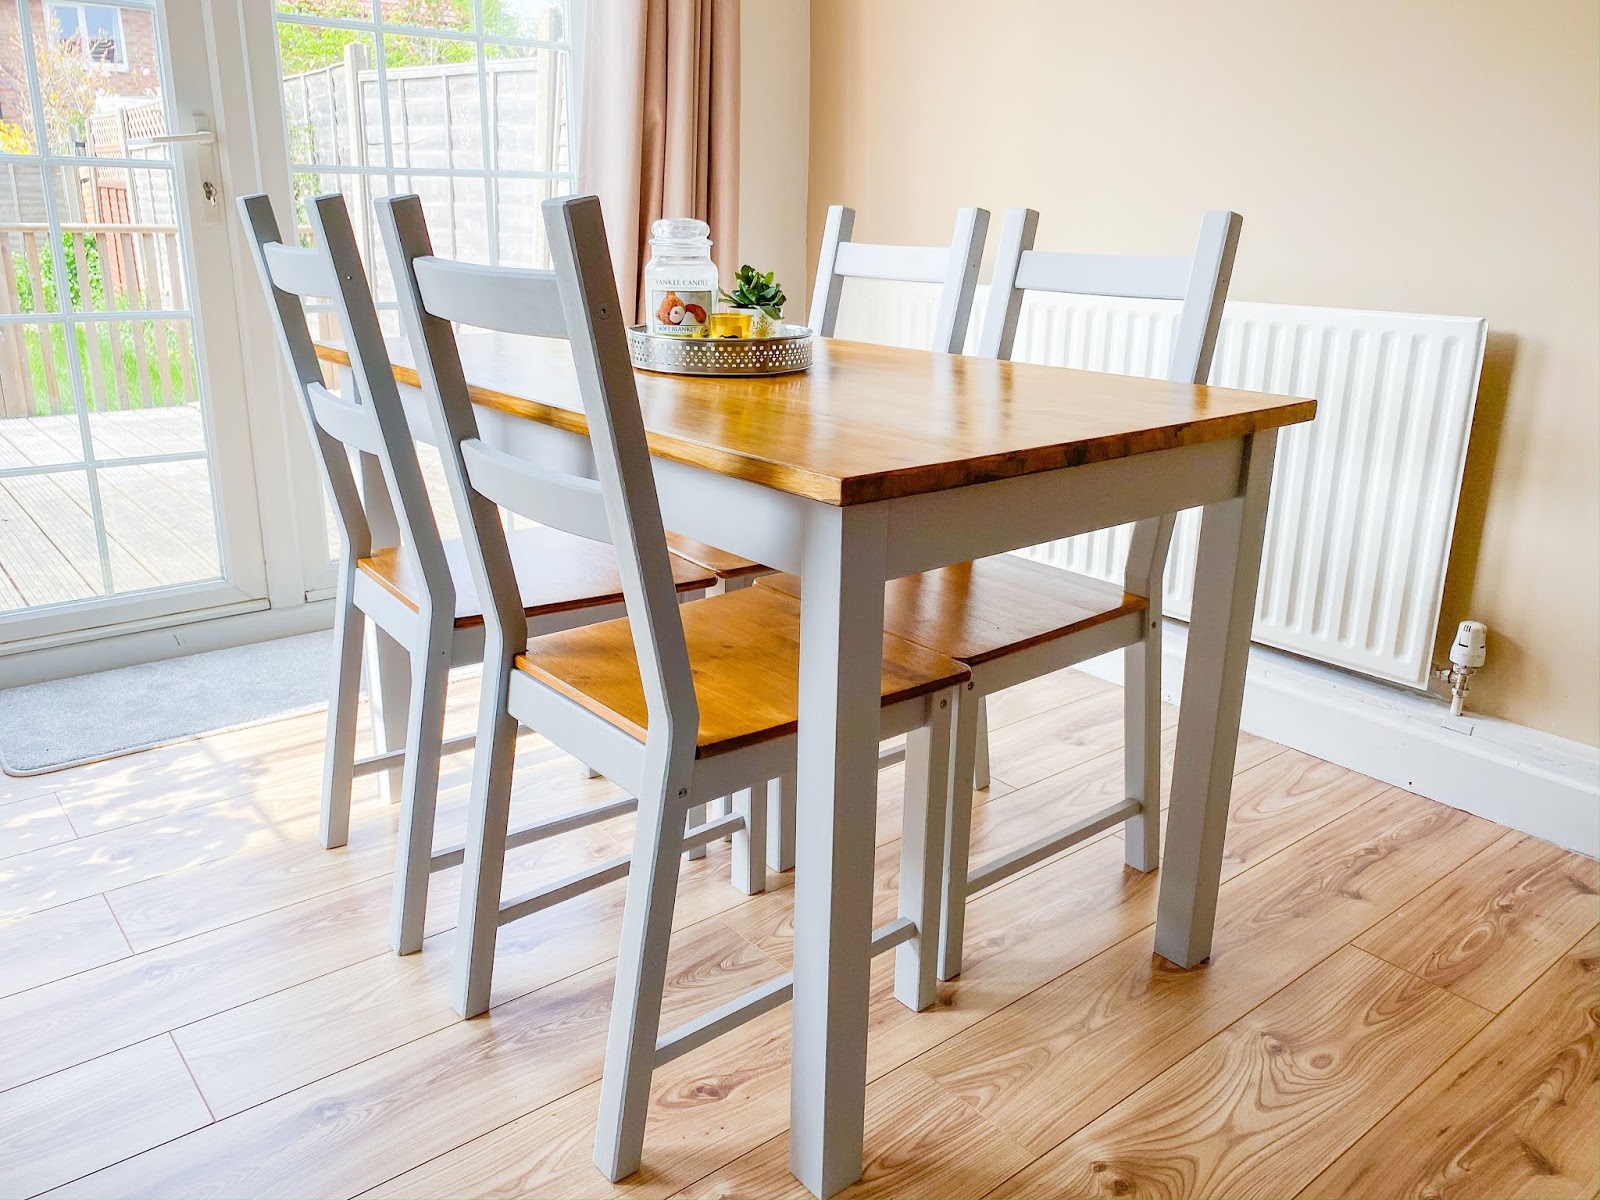
It looks a thousand times better than it did before and I'm so excited to share with you how I DIYed this beauty so that you can DIY your own too.

Before, my table and chairs were dull, plain and boring. I'd been meaning to give this table a much-needed makeover since I bought it almost two years ago and I don't think I could stand looking at that dull pine coloured wood anymore. There were paint splashes all over it from when we painted the house way back when we moved in and it still had the names of the previous family's kids pencilled on the frames of two of them. There was nothing special about this table at all and in fact, the state of it was quite embarrassing.
The table and four chairs were originally from Ikea, but I picked it up from Facebook Marketplace for just £30. The family had obviously had an upgrade but I could see the potential to turn this table into stylish and chic dining room furniture that looks more expensive than it is.
Our new house has a separate dining room which has me all kinds of excited. Even if we don't eat there, I know I can make the room Pinterest perfect especially with our newly painted table. Don't even get me started about how Pinterest-worthy I want to make our next place...
Materials :
For this DIY, you can use any wooden dining table and chairs.
I have the IKEA IVAR chairs which you can pick up for £15 or you can get four of them with the INGO dining table for £105.
Our table, on the other hand, is the Bjorkudden dining table which is also from Ikea but no longer available.
The table is slightly different from the chairs as it's made of solid birch and sealed with acrylic lacquer whereas the chairs are solid pine and ready to paint.
Personally, I'd recommend finding your furniture second-hand for a little upcycling and to keep the cost down, but if you're happy to paint something new and spend a little more, the Ikea combo would be perfect to use.
You'll also need:
- Electric palm sander (Mine was £15 at Argos)
- Sandpaper
- Paintbrushes
- Furniture paint - I'm using the Ronseal Chalky Furniture Paint in Dove Grey
- Interior varnish - I'm using the Ronseal Interior Varnish in Medium Oak Satin
- Floor coverings of your choice (cardboard boxes work best!)
Step one: Prep the wood
The first thing I had to do was to sand the surfaces of the table and chairs ready to paint.
The chairs needed a light sand to remove any oils or residue on the seat and paint splatters and the table needed to be sanded down completely. The acrylic sealant needed to be removed entirely so that the paint and varnish can stick to it and ensure it has a high-quality finish.

I actually did the chairs first and then the table because I had to buy an electric sander. The table took a little longer because of the acrylic but it was totally worth it.
Tip: If you're not sure that you can sand a surface down and keep the grain, check what the furniture is made from. Some Ikea furniture is not solid wood and the grain is printed on so sanding will ruin the surface. If you're still not sure, sand a part of the wood that isn't visible (like under the table) as a tester patch.

The chairs needed a light sand to remove any oils or residue on the seat and paint splatters and the table needed to be sanded down completely. The acrylic sealant needed to be removed entirely so that the paint and varnish can stick to it and ensure it has a high-quality finish.

Tip: If you're not sure that you can sand a surface down and keep the grain, check what the furniture is made from. Some Ikea furniture is not solid wood and the grain is printed on so sanding will ruin the surface. If you're still not sure, sand a part of the wood that isn't visible (like under the table) as a tester patch.

Step two: Painting
After the surfaces are sanded, it's ready to paint.
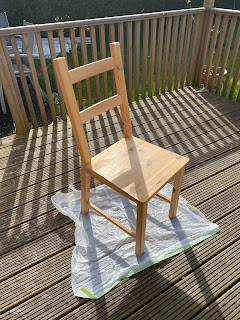
It was a beautiful day so I took the chairs outside and used a plastic bag to protect the decking. (This is before my boyfriend gave me the idea of using cardboard instead. Duh.)
To make the painting process easier, I unscrewed the seats of the chairs as these would be varnished whereas the frames were being painted.
I really wanted to perfect this farmhouse look so all surfaces (seats and tabletop) were to be varnished and everything else was going to be grey (frames and legs).


Painting the chairs was easy because it didn't need a lot of sanding. It only took two coats to cover and about 2-3 hours of drying time outside in the sunshine. I did miss a couple of bits which I went back to later and covered the missed sections seamlessly.
It was a beautiful day so I took the chairs outside and used a plastic bag to protect the decking. (This is before my boyfriend gave me the idea of using cardboard instead. Duh.)
To make the painting process easier, I unscrewed the seats of the chairs as these would be varnished whereas the frames were being painted.
I really wanted to perfect this farmhouse look so all surfaces (seats and tabletop) were to be varnished and everything else was going to be grey (frames and legs).


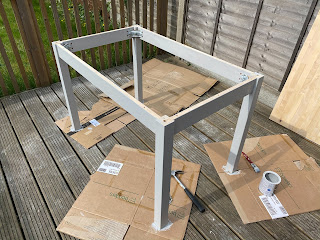
Painting the table was a lot easier than the chairs though because it wasn't as fiddly and there were fewer pieces to worry about coating.
The finish on the furniture was really impressive. It looked chalky as expected, it covered the surfaces evenly and the colour was exactly what I wanted from it.
The finish on the furniture was really impressive. It looked chalky as expected, it covered the surfaces evenly and the colour was exactly what I wanted from it.
Step three: Varnishing
After painting, it was time to varnish the seats and tabletop which were a little more tedious.
Varnish can get absolutely everywhere so I was sure to lay down a lot of cardboard and work carefully.
Varnish can get absolutely everywhere so I was sure to lay down a lot of cardboard and work carefully.
A little tip: don't wear anything you care about whilst varnishing wood!
Varnishing the seats and tabletop took a lot longer than the painting. It took about 6 hours to paint all the seats and the same for the tabletop. There's an hour of drying time between each coat which was perfect for tea breaks, snacks, scrolling through Insta and beating that level on Candy Crush.

It took about 3 coats in total for each surface and I had to be sure to paint both sides of the seat and tabletop for a seamless and high-quality finish.
It's really important to go with the grain when varnishing to avoid messy brushmarks and to apply the varnish evenly to stop the stain going patchy. I had a couple of spots that had gone patchy having used wood varnish for the first time, but I don't think you can really notice it unless you look for it.
Varnishing the tabletop took a little more focus than the seats simply because I only had a small brush, so I had to be careful with my brush strokes and keep going with the grain. I found it harder because it was a larger surface to cover and I needed the top to be perfect.
I think I did a good job but the sides didn't go to plan. The varnish dripped a little more than it did on the seats and so it left some darker and awkward patches. Unfortunately, it isn't anything I can fix without sanding it down and starting again. It's not too bad but I think I will fix it in future.
I think I did a good job but the sides didn't go to plan. The varnish dripped a little more than it did on the seats and so it left some darker and awkward patches. Unfortunately, it isn't anything I can fix without sanding it down and starting again. It's not too bad but I think I will fix it in future.
The most important part of varnishing though was the last coat. Before the last coat, I had to sand down the surfaces lightly and wipe them with a damp cloth. I was a little sceptical of this step and worried it I would ruin all my hard work but this helped the final coat of varnish stick to the wood and leave a beautiful satin finish. The relief when I didn't ruin it!
Step four: Enjoy your new dining room table!
I am completely in love with my new table and chairs. The farmhouse look is perfect for our new home especially as the dining room is right next to the kitchen which is white with grey accents. It'll work really well and I just can't wait!
Check out this before and after:
Check out this before and after:
Before:

After:

How long did the DIY take?
The DIY took me about 3 days to complete. I did the chair frames on the first day, the seats the next day then I completed the table in one day. If I had my sander earlier on, I would have probably completed it all in two days. You definitely need it for the drying time in between. It all depends on how much time you have too and whether you want to make it an all-day project or spread it out like I did. It's definitely advisable to give each coat of paint and varnish the recommended drying time between coats. You don't want to go wrong there!

How much did it cost?
Everything including the table, chairs, tools and paint cost me just under £75 which I think is an absolute bargain.
The biggest saver was getting the furniture cheap. I highly recommend shopping around on eBay, Gumtree and Facebook Marketplace for your furniture and look for something that you can see has potential for a makeover.
Even if you were to buy the furniture new from Ikea and DIY that, it would cost £150 in total. A complete bargain still to be fair considering the price of furniture theses days!
It's the perfect on-a-budget DIY that'll give you the look of something a lot more expensive. A set like this can cost you around £200-£400 brand new so it's a no-brainer to get DIYing yourself.

I'm so happy with this DIY! It's probably one of my biggest projects so far as well as one of my favourites. I'd love to know what you think of this DIY and if you'd go for it yourself. Also, you can pin my graphic onto Pinterest to keep it on a board for future reference! (It'd make me really happy if you did.)
Would you start a project like this? And what colour would you paint your dining set?


I love the idea of up-cycling second hand furniture and you've done such a good job. The table now looks a million times better <3
ReplyDeleteClaire, G is for Gingers