Last weekend I was feeling particularly arty crafty especially after making a bunch of crafty things for work! In the spirit of art and all things creative, I decided it was time to do something with the mugs and sharpies Viking-Direct.co.uk kindly gave me after the #VikingArtyParty. I was so excited to get started on these and actually, I think they turned out pretty great! With that said, I think it's pretty obvious that I just wanted to show them off and I also thought I could run you through my process and how you can create this DIY for yourself!
So Sunday morning I sat myself down to start, but first took the time to Pinterest search other DIY sharpie mugs. I searched up mug designs for inspiration, what pens I should use and also baking instructions for once the design was done. With all the things I needed in front of me, my research done and a fresh new set of colourful sharpies, I was ready to get started.
I'd like to stress the importance of research pre-DIY because you need to make sure you're going to get this as right as you'd like. You want to know exactly how you'd like to design your mug, how to do it, and all the ins and outs of your DIY including any issues you could potentially come across. As much as I'd love for you to go by mine - I am NO expert and would really recommend for you to have a look around at other people's designs and methods to see how you'd like to go about making yours!
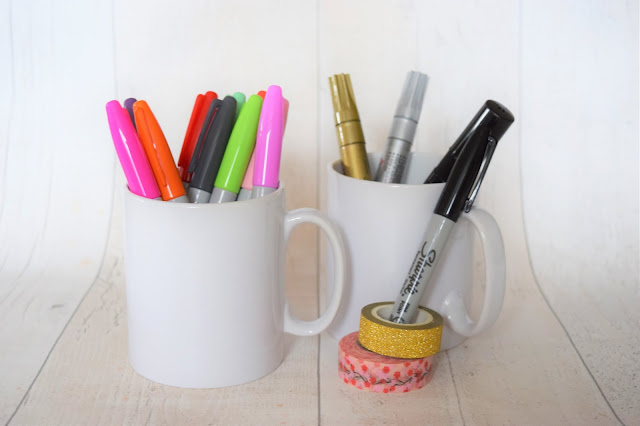
For my DIY Sharpie Mugs I used:
- Rainbow Coloured Sharpies - The regular ones
- Metallic Posca Paint Pens
- 2 Plain Ceramic Mugs
- Nail Polish Remover
- Cotton Pads
ink, nail polish remover, cotton pads and most importantly your time. On that note - I later found out that the Posca paint pens are a absolute killer to clean off so here's where you cannot make mistakes! It is possible to clean off - but in small doses only. More on that story later...
How to DIY Sharpie Mugs:
Clean your mug and make sure it is 100% dry and clean before you start. Then simply draw on your design in Sharpie pens and Posca paint pens as you'd like! It's as simple as that.
Just a tip though, the Posca paint pens should be last on as these are more paint based and Sharpie won't go well on top of it. And if you'd like you can draw your design on tracing paper first before transferring the design onto your mug. You can't really pencil on the design straight on unless you're really good at drawing on curved surfaces. I personally wanted to free hand my design to see how I would get on as I wasn't working with anything too difficult and wasn't being too precious. If I made any mistakes I simply used the nail polish remover an cotton pads to fix it up and start again.
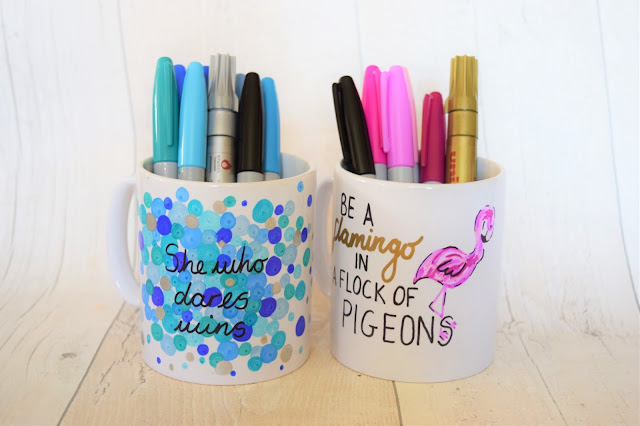
For my first design I really wanted to use this particular quote about being a 'flamingo in a flock of pigeons' because it's simply one of my favourites. It reminds me everyday to stand out and be myself. I feel like I can relate to it well because I love being confident in my quirky style, being outstanding or just generally being confident and happy within myself whether it pushes me out of my comfort zone or not. Either way, I thought it would look sooo cute on a mug too!
My flamingo I'm super proud of because I completely free handed it! I was going to go for a block coloured flamingo but I decided to go for a multi-tonal 'painted' effect spontaneously; And though I scared myself initially and thought I'd buggered it up, when I finished it I was so happy and properly proud of myself considering it has been a while since I've been this creative!
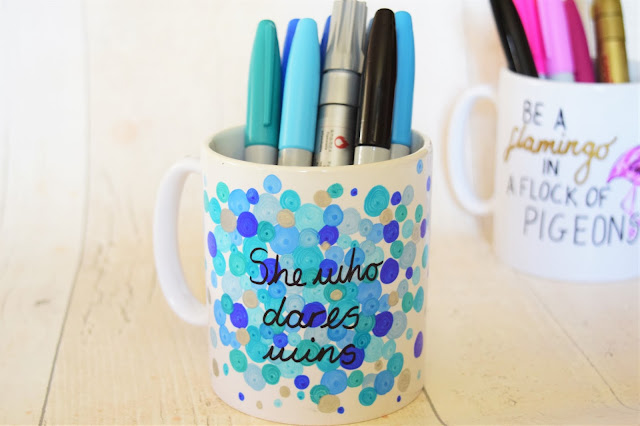
My second design was another quote I'm totally won over by and like to live by as often as possible! She who dares wins. Because it's true really isn't it? It reminds me to keep trying and daring myself to push beyond my own limits! And I love it because it reminds me of my boyfriend too. He says it sometimes and also because it's from one of our all-time favourite shows Only Fools and Horses! It reminds me to never give up and aim to win!
So instead of giving up, I carried on my attempts to rid the mug of silver paint and see what I had to deal with. I decided to cover the scratches up with a multi-tonal, big, bold and blue polka dot print that actually turned out so much better than expected! I absolutely love my mistake for this, because I adore how this mug came out! You can see the scratches through the Sharpie colours if you look carefully but it's nothing too bad. And with the quote in a bold black over the top in my own handwriting, I was done. Surprisingly the quote with no mistakes! Because that would have been awful to try and fix... Ha.
Ta-da! Two pretty awesome mugs if you ask me. And I know I'm tooting my own horn, but I'm really proud and I love them quite a lot!
To finish these off, you'll need to pop them in the oven to bake. After my long research session and coming across a blog called Something Turquoise written by a woman called Jen! She had done these sharpie mugs before too and had some great instructions on how to bake these mugs which I'd love to share with you here too. If you'd like to check out her DIY mugs or see the instructions from her directly, please visit her blog here because they're seriously amazing! Jen says it's best to bake them 72 hours (3 days) after they've been painted to allow the paint and ink to sink into the ceramic. Once done you can sit it in a cold oven and then set it to 220 degrees Celsius for one hour and then leave to cool in the oven. It's important to put it in the oven when it's still cold so that the ceramic gradually heats up and it doesn't crack. And then the same when it cools down so the ceramic gradually cools and again doesn't crack. Just an FYI, the paint/ink will darken in the oven as it bakes so don't panic if the colour darkens a bit!
So in short: wait 72 hours, sit in cold oven, bake at 220 degrees for one hour, let cool down completely and voila!
I haven't baked mine yet as I still have until tomorrow before I bake them. I am going to bake them late on Wednesday night so they can cool overnight, and I'll probably update this post on how that goes later on. That all said, I don't think I'll be using these mugs as regular drinking mugs. As much as I'd love to, I'm worried about the washing process as they aren't Sharpie paint pens which work on these mugs a lot better from what I've read. I also don't trust my dishwasher to not wash off my designs, or a sponge to not scratch any of it off. I do although think I will be confident enough to test this on the back of the blue mug just for the blog post!
I love these so much I think I'll use them as pen pots considering that I'll need easy access to all my stationery soon. That's all for when I re-organise my desk for September and returning to student-hood! I think they'll make more useful and prettier pen pots than anything I have at the moment.
So have you ever DIYed Sharpie Mugs? If not would you give this DIY a go? Let me know in the comment box or on my twitter ♥ I hope you're all having a lovely week!


I love the flamingo one! You've made such a good job of it - I love being crafty when I have spare time <3
ReplyDeleteGisforgingers xx
These are too cute! I just pinned this and hope to try it someday. I'm really bad at writing so we'll see how it goes ;)
ReplyDeleteBlessings,
Edye | Http://gracefulcoffee.wordpress.com
I love these babe! What a cool idea :) x
ReplyDeletewww.hello-cat.blogspot.co.uk